One thing that animators can do very quickly and accurately is draw lines on paper. And there are a lot of line drawings involved in making an animation, so you don’t want to make any extra work for the animator. We wanted to give the animators an easy way to convey to the computer, through their drawings, what a fully shaded and rounded-looking character would look like. The following image of the back of Max’s head will give you an idea of what we came up with.

The artist would draw something like the image on the left – indicating the shape of the characters, as well as the outline of regions where the character should be bright or dark. Once we scanned in this image, we could start to do our magic on it. Christine Chang implemented a paint program that allowed an operator to fill each of these regions with a different color or shade, as shown in the image on the right.
But how do you go from that image to something that looks fully smooth and rounded? My basic approach was to use my fast blurring technique to blur out the regions inside the character. First, in software we clean up the painted image by removing the outlines and setting everything outside the shape to black:

Then we apply those fast blurs I talked about yesterday. In the two images that follow, we smear first horizontally, and then vertically:


But like I said yesterday, one blur isn’t good enough – the result doesn’t look quite as smooth as we would like. So we just smear again, first horizontally and then vertically:


Now it’s starting to look good. We had to smear four times to get that result (twice horizontally and twice vertically) but that’s ok, since the technique is fast.
But this result is clearly not yet what we want – the shape itself is blurry, not just the internal details. So next we use the silhouette of the original unblurred shape to trim the result – just like using a cookie cutter:
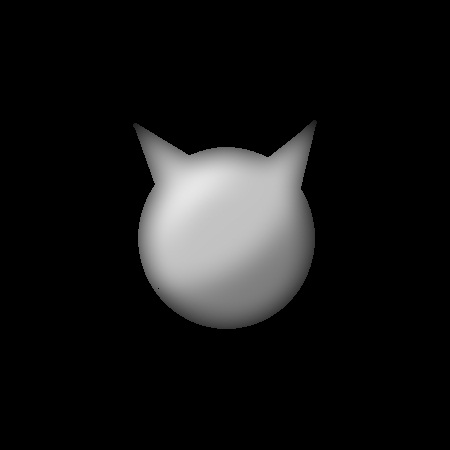
It’s almost there now, but not quite. Max’s head is too dark around the perimeter. But why? Because when we blurred everything, the black background color bled into the shape, creating an unwanted vignetting effect. We need to need to get rid of that vignette.
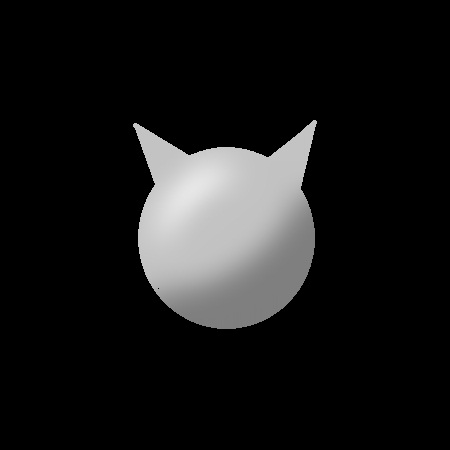
Fortunately, we know exactly how much black has bled into the shape at every pixel – exactly the same amount by which the silhouette becomes darker at that pixel when we blur the silhouette. And that gives a solution to this problem: At every pixel inside the shape, we need to divide by the brightness of the blurred silhouette. Most places this won’t change anything – the blurred silhouette is white almost everywhere. But near the perimeter, the result will get brighter by just the right amount:
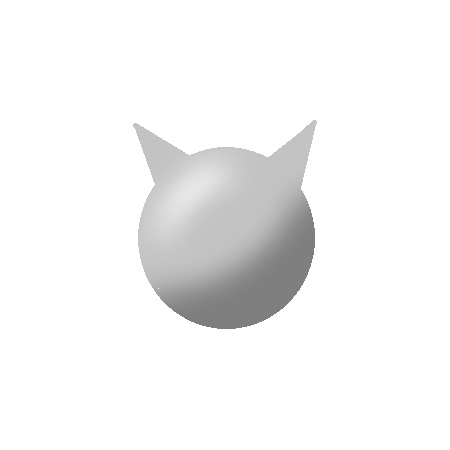
Aha! Now it’s starting to look like a rounded 3D version of Max’s head. All that remains is to add the character to the background. In the real test, that background was the 3D computer graphic room, but here I’m just going to drop him into a white background. Also, of course, in the actual test Glen Keane draw the entire body of Max, not just the back of his head. 🙂
So there you have it – we are almost done with the series. Mostly all that remains is to talk about shadows and a few little details about color, which I’ll discuss tomorrow to wrap up.
In my own personal experience doing this, the part of the above recipe that was a true revelation for me was in the step where I realized I just needed to divide by the blurry silhouette to get rid of the vignetting around the edges. That was the first time I realized that I could do any arithmetic I wanted on entire images, treating them just like numbers that can add, subtract, multiply and divide. There was a sense of freedom in realizing this, and it led me to start thinking more out of the box about images and the infinite possibilities of computer graphics.
I’m sorry. What exactly are you dividing by what?
I am dividing the blurred image by the blurred silhouette.
But I’m only doing this divide within the region covered by the sharp silhouette (which is the only region we care about anyway). Otherwise I would end up with a divide by zero error.
Here is the operation run at every pixel, as pseudo-code (where 0.0 is black and 1.0 is white):
if sharp_silhouette equals 0.0 then
0.0 // if outside the shape, everything is black
else
blurred_image / blurred_silhouette // if inside, remove vignette