Democracy

Halloween eve in New York City, and the last day before my writing partner and I begin our November novel. In this pause between two projects, I have time to reflect with nostalgia on something we used to have in NYC. It’s not something everybody cares about, and I realize I’m going to sound hopelessly old fashioned in some circles for being so gauche as to mention this. But I can remember a time – not all that long ago really, when New York City actually had a democratically elected mayor.

Now of course we have the illusion of an election. Everybody here is going through the motions, pretending it’s a real election, pretending that there is any doubt as to the outcome. But of course it’s not a real election. It’s like some poor sap being pushed into the ring with a raging gorilla, and told to fight a fair fight.

Well, almost like that. Except in this case, the gorilla weighs around sixteen times as much as his opponent.

And the odd thing is that none of this is about who is the better candidate. There are good things and bad things to say about both the incumbent mayor Mike Bloomberg and his challenger Bill Thompson. Each has done commendable things during his political tenure, and each has stumbled on occasion. But that’s not what this election is about, not even a little.

This election is about three hundred and fifty million dollars – around one third of a billion bucks. That’s how much our current Mayor, a billionaire worth around $17 billion, will have spent on his three runs for office by election day next Tuesday. By comparison, the Obama presidential campaign spent less than twice that much to reach an electorate approximately one hundred times larger.

Now don’t get me wrong. I’m not saying that’s a lot of money. On the contrary, it’s hardly anything at all – chump change really – if you are Mike Bloomberg and so happen to have $17 billion in the bank. By way of comparison, let’s say you were running for mayor, and you decided to self-finance your campaign. Suppose you had, say, $10,000 in your bank account (times being hard and all). Well, if you spent the same proportion of your personal wealth as our current mayor has this time around, the election would cost you less than a hundred bucks – about the cost of a nice dinner for two in Manhattan, if you order wine and dessert, and don’t have to pay for parking.

So basically all our mayor is doing, in terms of his own personal spending, is going out for dinner with a lady friend and maybe getting a nice merlot and the blueberry pie. He’s not even taking the car.

But from the point of view of us ordinary mortals the situation is quite different. Bloomberg has top ad agencies, production companies, store fronts in Manhattan filled with teams of campaign workers, the services of the best professionals money can buy, all working around the clock, all focused on trying to discredit Bill Thompson. Almost every day I get a fancy flyer in my mailbox from the Bloomberg reelection campaign. And these are no ordinary flyers. They are like nothing you’ve ever seen before in an election. The production quality on these things makes even the polished Obama campaign literature look like it was hand cranked on a used mimeograph machine by some sweaty old guy in a basement.

Somewhere there are suppliers of fancy paper, exotic inks, custom illustrations and high class glossy photography, as well as an entire Letterman-show full of writers, who are thriving despite the bad economy, just to make those flyers that keep landing in my mailbox. And every one of these lovely flyers does the same thing – attack Bill Thompson with the intensity of a pack of feral dogs ripping into a downed calf.

I’m starting to wonder whether Bill Thompson isn’t actually some sort of saint – a holy man with angel wings and the moral discipline of a Mahatma Gandhi. Otherwise, by now we would surely all be convinced the man was a raving pornographic child molester, given the sheer volume of vitriol being hurled at him by the Bloomberg campaign.

Don’t get me wrong. Our incumbent mayor has achieved some fine things at City Hall. But this is crazy. The Thompson campaign is completely outgunned, shouted down at every turn by Bloomberg’s shockingly over-financed operation. The challenger is unable to get any message at all out to the voters. Anything he might have to say has been overwhelmed by the solid wall of media blitz that is the Bloomberg campaign.

No, Mr. Bloomberg is not breaking any laws by doing this. The fault lies with our election laws, which are so screwed up that they indeed allow wealthy people to buy elections. And to be fair, it wouldn’t work if Bloomberg were an atrocious mayor. But nonetheless, this is not an election about the merits – it is not about which of the two candidates is better. That question has been effectively buried under an avalanche of lopsided spending. This election is about one thing: a sixteen to one spending ratio.

And so I find myself asking the following question: If you believe in the idea of fair elections, can you vote for someone who is deliberately, ostentatiously subverting the process? And if you were to pull the lever for that guy, knowing he was effectively buying your vote, could you still tell yourself that you live in a democracy?

Wild things, part 7

That’s pretty much it for the new techniques developed for combining hand drawn and 3D animation for the Wild Things test. The only thing left to talk about is shadows. Here we cheated, in a really outrageous way – but it paid off.

When you create a computer graphic scene, you specify a number of light sources. The computer program calculates, for each pixel in the image, where is the visible 3D point at that pixel, and from that it calculates which of your light sources are able to illuminate that point, and which are in shadow. After all, not every light source can reach every point in the scene. Sometimes there are objects in the way that block the light from some light source or another – thereby creating shadows.

In order to make Max and his dog feel as though they were part of the 3D scene – even though they were really hand-drawn animated characters – it was very important that they cast shadows. Otherwise they would have appeared to look like they were just floating in front of the scene.

Of course, Max and his dog were not really 3D objects in the scene. So we couldn’t just throw some sort of algorithm at the problem of what shape their shadows should take – there is, quite literally, no mathematical solution to that problem. Fortunately, we had animators who were perfectly happy to draw the outline of a shadow. And here is where we cheated. Just as we had the animator draw the outline of a character, and then used a computer paint program to fill in that character’s colors, similarly, we asked the animator to draw the outline of the shadow that Max or his dog should cast onto the 3D scene.

In other words, we relied on the animator’s talent to figure out where the shadow should go. Once we knew the shape of the shadow in any given frame of the animation, we used that shape to suppress the lighting from the key light source in the 3D computer graphic lighting. The visual result was the same as if we’d had a magic computer graphic algorithm to cast true shadows onto the scene.

Note that we were not painting a shadow onto the scene. Rather, we were invoking the same computer graphics techniques that we used to light and shade the 3D background – except we were giving the animator a chance to add shadows to this 3D shaded scene.

On a philosophical level, this created a very interesting interaction between animator and scene. 2D hand drawings were being used to reach in and directly modify the physics of a 3D computer graphic simulation – in particular, blocking 3D light sources at selected pixels. Effectively, we were casting actual shadows from non-existent objects.

The results were spectacularly successful, as you can see from watching the Wild Things test.

The only final note – and it is an important one – is that we were very careful throughout the production to choose the colors for the 3D computer graphic background and the image-processed hand-drawn characters that would mesh together perfectly. I can’t overemphasize how important this is when making a film that combines work from two very different media.

Examined in hindsight, our little test for “Where the Wild Things Are” represented a new way to look at computer animation. It wasn’t the result a single technique, or even a single approach, but rather a mash-up of complementary techniques and approaches, a way of mixing the old and the new, of using the computer as a tool in a very different way. That little test floated around the industry in the following years, and ended up influencing many things that were to come after, from “Who Framed Roger Rabbit” to the “Toy Story” films and beyond. I would argue that the success of this test proved the point of what my friend Lance Williams used to point out, around the time we were first bringing Max and his dog to life: “Computer graphics,'” he would say, “is limited only by your imagination.”

Wild things, part 6

One thing that animators can do very quickly and accurately is draw lines on paper. And there are a lot of line drawings involved in making an animation, so you don’t want to make any extra work for the animator. We wanted to give the animators an easy way to convey to the computer, through their drawings, what a fully shaded and rounded-looking character would look like. The following image of the back of Max’s head will give you an idea of what we came up with.

The artist would draw something like the image on the left – indicating the shape of the characters, as well as the outline of regions where the character should be bright or dark. Once we scanned in this image, we could start to do our magic on it. Christine Chang implemented a paint program that allowed an operator to fill each of these regions with a different color or shade, as shown in the image on the right.

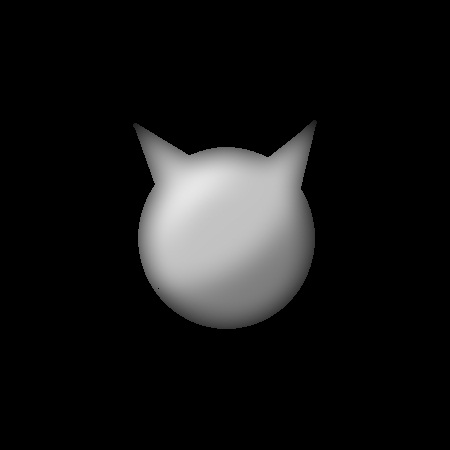
But how do you go from that image to something that looks fully smooth and rounded? My basic approach was to use my fast blurring technique to blur out the regions inside the character. First, in software we clean up the painted image by removing the outlines and setting everything outside the shape to black:

Then we apply those fast blurs I talked about yesterday. In the two images that follow, we smear first horizontally, and then vertically:

But like I said yesterday, one blur isn’t good enough – the result doesn’t look quite as smooth as we would like. So we just smear again, first horizontally and then vertically:

Now it’s starting to look good. We had to smear four times to get that result (twice horizontally and twice vertically) but that’s ok, since the technique is fast.

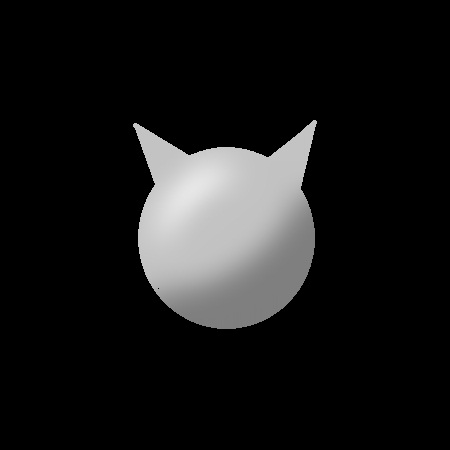
But this result is clearly not yet what we want – the shape itself is blurry, not just the internal details. So next we use the silhouette of the original unblurred shape to trim the result – just like using a cookie cutter:

It’s almost there now, but not quite. Max’s head is too dark around the perimeter. But why? Because when we blurred everything, the black background color bled into the shape, creating an unwanted vignetting effect. We need to need to get rid of that vignette.

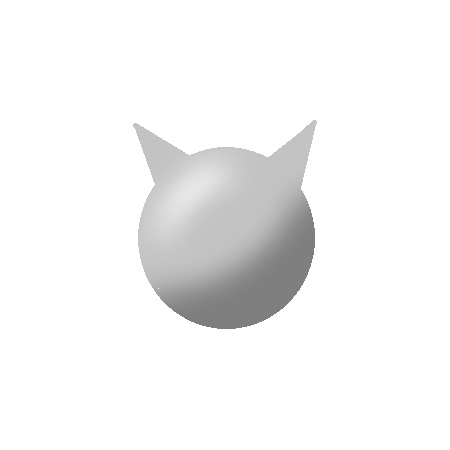
Fortunately, we know exactly how much black has bled into the shape at every pixel – exactly the same amount by which the silhouette becomes darker at that pixel when we blur the silhouette. And that gives a solution to this problem: At every pixel inside the shape, we need to divide by the brightness of the blurred silhouette. Most places this won’t change anything – the blurred silhouette is white almost everywhere. But near the perimeter, the result will get brighter by just the right amount:

Aha! Now it’s starting to look like a rounded 3D version of Max’s head. All that remains is to add the character to the background. In the real test, that background was the 3D computer graphic room, but here I’m just going to drop him into a white background. Also, of course, in the actual test Glen Keane draw the entire body of Max, not just the back of his head. 🙂

So there you have it – we are almost done with the series. Mostly all that remains is to talk about shadows and a few little details about color, which I’ll discuss tomorrow to wrap up.

In my own personal experience doing this, the part of the above recipe that was a true revelation for me was in the step where I realized I just needed to divide by the blurry silhouette to get rid of the vignetting around the edges. That was the first time I realized that I could do any arithmetic I wanted on entire images, treating them just like numbers that can add, subtract, multiply and divide. There was a sense of freedom in realizing this, and it led me to start thinking more out of the box about images and the infinite possibilities of computer graphics.

Wild things, part 5

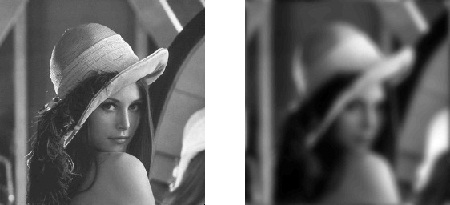
On one level, what Richard Taylor was asking for was easy. Below is an example of blurring an image. On the left is the original, and on the right is the blurred version.

By the way, for those of you who don’t know, this is an image of Lena Sjööblom. She was originally the Playboy playmate of the month in November 1972. Her image started to be used by appreciative computer vision researchers at the University of Southern California, and she ended up becoming the standard test picture for image processing research. Needless to say, the original photo showed quite a bit more of Lena. If they had used the entire image, the field of image processing might have taken quite a different turn. You can read the whole story here.

Blurring is easy when you use a camera. Just push the lens out of focus, and you get a nice blurry image. That’s because every point of the original image gets smeared out over many points of the resulting blurry image. I could have done it that way in computer software, but that would have taken a very long time. Computers then were a lot slower than they are now. The image below shows the problem I was facing:

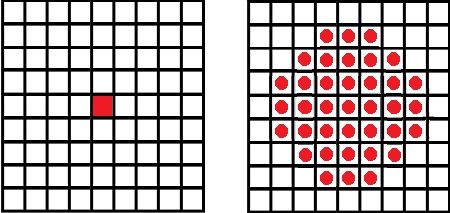
If you want to blur an image, then every pixel of the original image (left) needs to get added to many pixels of the blurred image (right). This is a serious problem if you’re image is typical size – say 1000 × 1000, or a million pixels. If your blur size is 30 × 30 pixels, then every pixel in the original image needs to get added to about 1000 pixels in the blurred image. We’re talking about a billion or so operations here. Back when we were doing the Wild Things test, that was way too much computation to be practical.

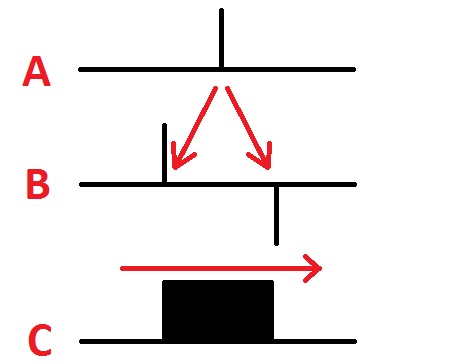
I needed to come up with something faster. The breakthrough came when I had the idea of smearing. If you think of the value at one pixel of an image, you can do the following to smear that pixel value out in a horizontal direction. First, copy the pixel value to another image, but offset to the left. Also copy the negative of the pixel value to this other image, but offset to the right. You can see this represented in the image below, in the transition from A to B:

Now here comes the secret sauce. Sum up all of the values in the result, starting from the left and going all the way to the right. What you end up with is the pattern in C above – a smearing out of this one pixel value over an entire region. What’s cool about this is that it doesn’t matter how far apart you separate the positive and negative values – the amount of computation stays the same.

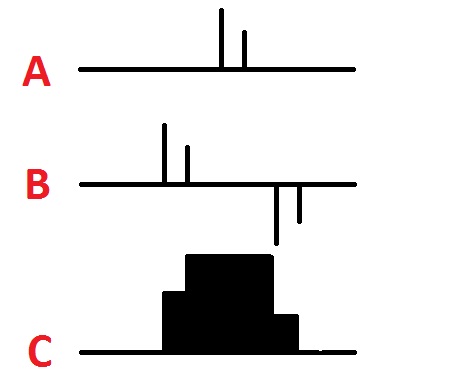
Of course it’s not all that useful to blur out a single pixel. But the nice thing is that if you start with more than one pixel value, everything still works. In the image below we have two non-zero pixels. Applying the same trick (going from A to B in the image), we get some positive values and some negative values. If we sum everything up from left to right (going from B to C) we end up with a blurred version of the original.

This trick works no matter how many pixels you start with in the original image. In fact, you can start with any image at all, apply the same trick, and you end up with a smeared out version of your original image. And the amount of computation doesn’t increase as the smearing gets bigger.

This gave me a way to create nicely blurred images without requiring too much computation. I could just do this smearing trick twice in the horizontal direction, and twice in the vertical direction, and end up with a really nicely blurred image – without needing to wait too long for the result.

So how did this little fast blurring trick let me create images of Max and his dog that looked rounded and 3D? We’ll get to that tomorrow.

Wild things, part 4

Today a friend – and reader of this blog – told me that when I describe how we did the Wild Things test, I should go into more detail about the technology. I objected that many people who read this are not technical in that way. But he pointed out that it would be a shame to water it down, when there are a number of people out there who really want to know the techniques. So I’m going to go for it, but before I do that I’m going to make sure you get the background, so that everything is sufficiently motivated.

First, a little history – let’s go back in time a bit, to the making of TRON. There were a lot of brilliant people behind the visual ideas in TRON. One of them was the art director, Richard Taylor. Richard was coming to TRON fresh from having worked for the legendary production company Robert Abel and Associates. While at Abel, Richard had perfected a technique he called the “candy apple glow” – which became a kind of signature look for the many award winning commercial spots created by Abel and Associates through the years.

The basic idea of the candy apple glow was to take a white silhouette image of an object, blur the hell out of it, and then slap the image of the original object on top. The result looked like a kind of corona surrounding the object. Edges remained crisp and well defined, but the entire object would seem bathed in an unearthly angelic halo.

It was a very successful look, much sought after by ad agencies, but rather difficult and expensive to achieve. In those days, the only way to composite images together was to run them through an optical printer – a big, cumbersome and expensive machine that reprinted film from one reel onto another, allowing you to apply a simple special effect each time you ran the film through the printer. In order to make the candy apple glow, quite a few steps through the optical printer were required, each one requiring another run of film through the optical printer.

First you needed to make a silhouette image of the object, white against black, then you needed to print a blurred version of that white against black silhouette. Then you needed to subtract the original silhouette from the blurry one – which required another run through the optical printer. Then you had to print the original image, adding it to the glowing white outline – yet another run through the optical printer.

The results looked great, but all those multiple passes through the optical printer were slow and expensive, and film costs ended up being very high – especially if you made a mistake anywhere in the process and had to do it all over.

So one day Richard said to those of us at MAGI, “Could you create the candy apple glow look in computer software?”

That turned out to be a fateful question…

Wild things, part 3

3D computer graphics is a great way to make things look real. After all, the techniques under the hood are basically simulating the physics of how real cameras capture real life: the shapes of objects, how a camera moves around a scene, the way light shines on surfaces. But there can be such a thing as being too realistic.

That’s one of the problems we were fighting in our Wild Things test. Here we had all of this fancy computer software that we had painstakingly tuned to convince people they were looking at reality, and now what we wanted was to convince people they were looking into a magical storybook. Not the same thing at all.

Fortunately, we had learned while making TRON that when you’re combining computer graphics with other things (like Jeff Bridges in a weirdly glowing spandex unitard), the trick is to modify the look of everything, so that it all meets in the middle. In the case of TRON the live action footage of the actors was deliberately given an eerie grainy look, and made to look hand-tinted – like something out of Fritz Lang’s “Metropolis” – and this same processing was done to the computer graphics backgrounds.

That, together with the “everything has red or blue glowing lines” motif, was very effective in marrying the foreground actors to the background computer graphics. The cranked-up graininess and stylized color palette masked any differences between computer graphics and physical props, and made you believe you were looking into some sort of consistently strange alternate universe – very different from the brightly lit, almost clinical, look of the scenes in TRON that were located in the “real” world outside the computer.

For Wild Things we were going for a very different look, but the principle was the same: marry foreground and background by visually stylizing both the computer graphics and the hand-drawn animated characters in a mutually consistent way. Today I’m going to talk about how we made the computer graphics backgrounds look like something out of a storybook. Then tomorrow I’ll talk about how we made the animated characters look like they were three dimensional.

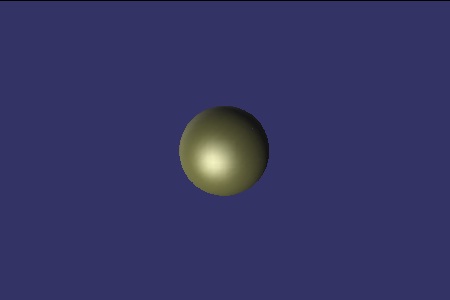
When you look at a real object lit by a light source, you immediately see that the light only directly affects the portion of the object that faces the light. The portion of the object that faces away from the light source remains dark. So generally cinematic lighting revolves around using a bright light in the front (the “key light”) to highlight the roundness of each shape, and a softer backlight (the “fill light”) to give definition to the shape’s silhouette. Using such a technique, the bedknobs on Max’s bed might have looked something like this:

That looks very nice, but it doesn’t look particularly magical. When you look at Maurice Sendak’s drawing style, you eventually realize that he had a wonderful trick of keeping you a bit confused about where the light comes from. In his drawings, light seems to come from everywhere and nowhere all at the same time. So to make this test, I modified our shading system in several ways. For one thing, I changed it so that the highlight on an object didn’t need to be in the right place. You could make an object brighter on the left, while having the highlight seem to come from the right.

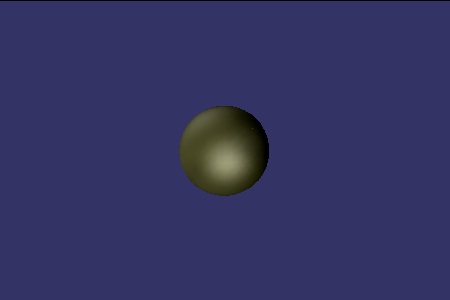
I also added an option to change the way objects in our 3D system react to light. Instead of only the part facing the light source getting brighter, I rigged it so that the light could seem to “wrap around” the object, bathing it in a softer light. This made the objects seem to glow a bit, like they do in Sendak’s illustrations. Finally, to capture the deliciously ominous feeling of the deep shadows Sendak adds to his illustrations, I added a feature that’s really impossible in reality – lights that can make things darker, instead of brighter. Using all of these techniques together, you could literally paint objects with light. So the bedknob on Max’s bed ended up looking more like this:

The difference is subtle but essential. The first bedknob looks like a simple but plausible 3D object. The second bedknob looks both real and not real, all at the same time. When an entire room is lit this way, the result looks not so much like a real place, but rather like an imagined idea of a real place. In other words, like the storybook version.

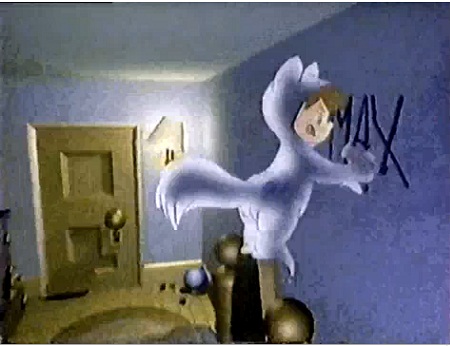
Here is a frame from the final test. With these lighting and shading tricks in place, the 3D scene seems to be slightly surreal, with a sense of drama and otherworldliness that would be hard to achieve using “physically correct” lighting:

The question still remained of how to take Glen Keane’s wonderful drawings of Max and the dog – which were really just pencil lines on paper – and make them appear to be rounded and three dimensional, so that they would look like they belonged together with the 3D backgrounds. And of course there was the little problem of how to make these pencil drawings cast believable shadows into a computer graphic scene.

Good topics for tomorrow!

Wild things, part 2

The process we came up with to do the Wild Things test ended up being called Synthamation. In concept it was very simple – but God was in the details.

It all started with an animatic provided by the Disney team – a shot by shot view of the 3D background, created as a series of hand-drawn sketches. Then our artists at MAGI (Chris Wedge and Jan Carlée) worked from this animatic to create 3D models of everything – the room, hallway, bed, staircase, the little table with the lamp on it seen in the last shot.

Chris and Jan then computer animated a camera path through their 3D scene that matched the successive viewpoints of the hand drawn animatics. The result was rendered out frame by frame, not as a fully shaded background scene, but rather as a series of computer generated line drawings (called a “pencil test”). These pencil test frames of the 3D animated scene were printed out on big sheets of paper, so that the Disney artists could use them as a guide to rotoscope the frame by frame animation of the characters of Max and his dog.

Rotoscoping in those days was a process whereby an animator draws on paper while looking through a big piece of slanted glass. The animator sees the paper containing his own drawing through the glass, while simultaneously seeing another piece of paper containing a pencil test frame reflected by the glass. To the animator, it looks as though the two pieces of paper are superimposed on each other. So he can always see the computer generated pencil test of the background image, but the drawing he makes actually goes onto a clean white sheet of paper.

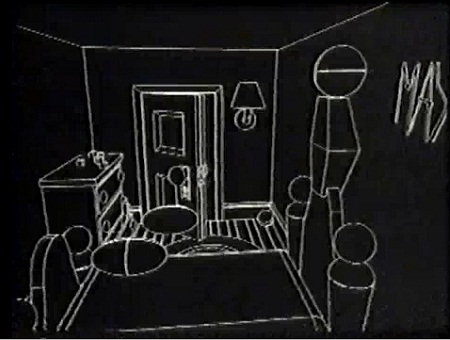
Here is where our team came up with a clever trick. When we rendered the pencil test, we added dummy versions of Max and his dog. These were only to guide the animator – they would not appear in the final animation. These dummy versions were really simple – each was just composed of a few simple shapes, as you can see in the image below. But that was enough to show the animator (in this case, Glen Keane) where to draw the characters for each successive frame of the animation.

The dummy characters also served another, more subtle purpose. In the final animation the hand-drawn characters are moving all around the scene – getting closer or further away, or running behind or in front of the staircase. The dummy characters allowed our programmers to know how far away to place the animated characters when they were finally composited into the scene. For example, in the final animation Max’s dog runs behind the staircase when he runs down the stairs – just like the dummy version of the dog.

When the animator was done, he had created various big stacks of drawings. Some of these drawings were of Max and some were of Max’s dog. We digitized each drawing into the computer at high resolution, using an Eikonix flatbed scanner. Once we had all the pieces scanned into the computer, all that remained to do was combine those pieces together in software, and add shading and lighting.

That last bit is not as simple as it might seem. We wanted the hand-drawn animated characters to appear not flat, but rather rounded and three dimensional – as though they were being lit along with the rest of the 3D scene. We also wanted them to cast shadows onto the floors and walls of the 3D computer generated background. And the background itself needed to have a kind of magical storybook appearance. To do all that, we needed to invent a few new techniques.

But that’s a topic for tomorrow.

Wild things, part 1

Seeing Spike Jonze’s excellent film version of Maurice Sendak’s “Where the Wild Things Are” got me thinking back to the time that I helped get John Lasseter started in computer graphics.

I know that sounds completely weird, little old me helping to get the director of “Luxo Jr” and “Toy Story” into computer graphics, but it turns out to be true. It all happened in the months after Disney’s release of TRON, which unfortunately had not been a raging box office success. Nonetheless, since I was the young “coming up with crazy new ways to do things” guy at MAGI SynthaVision – the Westchester based computer graphics production house where we did the cool light cycles, game grid and more for TRON – I was flown out to Buena Vista, California to meet with Disney’s brilliant young animation director John Lasseter, where the two of us brainstormed ideas.

I was itching to try out some new techniques for making flat-shaded characters look rounded and 3D, and other techniques for making 3D graphics look more like hand illustrated storybooks. Meanwhile John wanted to do something that combined hand-drawn characters with the sorts of 3D worlds he’d seen in TRON. Together we came up with a suitably harebrained scheme.

I would lead a team at MAGI back in New York, where we would create a shaded 3D background animation, while John supervised a team over in California – with the great Glen Keane doing the character animation – to create hand-drawn animated characters that the MAGI team would magically integrate into the 3D backgrounds, with matching lighting, shadows and camera moves. None of the commercial 3D graphics software everyone now takes for granted existed back then, so we pretty much had to come up with new and sometimes unexpected ways to do everything.

Fortunately, I was working with an incredible group of fellow young turks, including Josh Pines, Christine Chang, Chris Wedge, Jan Carlée and Carl Ludwig. Every one of these people went on to amazing careers. Josh ended up going to ILM, where he revolutionized the process whereby film and computer graphics are combined together, so that you can’t tell which is which (for which he won a Technical Academy Award). Christine ended up at Don Bluth Studios in Ireland, and Chris, Jan and Carl went on to co-found Blue Sky Productions, makers of “Ice Age”, “Robots” and other visually stunning films.

Our Wild Things test was delightfully successful, and John became completely smitten with the possibilities of computer graphics. There is a video of our little test up on YouTube. Unfortunately, soon after the test was finished there was a political regime change at Disney headquarters, and John Lasseter – the fair-haired boy of the outgoing regime – ended up getting fired, for the crime of continuing to push this weird new computer graphics stuff (hard to believe now but true). Fortunately, John was able to take our little “Where the Wild Things Are” test over to Ed Catmull at LucasFilm as a calling card, where Ed (who may be the smartest guy I know) immediately brought him on as creative director of what would soon become Pixar. The rest, as they say, is – well, you know.

Some of the techniques we came up with in doing that test were extremely cool, and I don’t think they’ve been properly described anywhere. So I’m going to take the next few days to describe them here. Think of it as a rare window into the old “wild west” days of computer graphics, when computers ran slow, programmers ran fast, and we all just made it up as we went along, with nothing to go on but some pixels and a dream.

A Serious Movie

Erwin Schrödinger introduced his famous “Schrödinger’s cat” thought experiment to illustrate the apparent absurdity of one of the key implications of quantum theory. Namely, its implication that something could simultaneously exist and also not exist. Basically, down at the quantum level, a particle can remain in a quasi-state of existence, both existing and also not existing. The particle stays this way until it is observed by an outside system. At that moment it instantly “snaps” to one of the two states.

Schrödinger’s complaint was that this can lead to absurd outcomes, since you could easily tie a macroscopic object – say a house cat – to the fate of a single quantum particle (recipe: place the cat in a sealed box with a geiger counter; when the counter detects a single random quantum event, kill the cat). Quantum theory states that the cat is literally both alive and dead at the same time. Until, that is, somebody opens the box, at which point the cat instantly snaps to one of its two quasi-states: It becomes either a fully alive cat or a fully dead cat.

Yes, this sounds absurd, and people not familiar with quantum theory often respond by saying that we’re just describing the probability that the cat is alive or dead at any given moment. In fact, they say, the cat must always be completely alive or completely dead. But that turns out not to be the case. Strange as it seems, it turns out that Schrödinger’s objection was wrong – quantum theory’s prediction has been experimentally verified to be true. If you run various experiments with actual particles, the “cat is either completely alive or dead” assumption gives you the wrong answer. If you assume this crazy sounding “quasi-state” of an object both existing and not existing at the same time, the results you get match the experimental data perfectly.

Joel and Ethan Coen’s recent film “A Serious Man” is actually a treatise on this very subject, in disguised form. It starts with a reference to Schrödinger’s famous thought experiment, and then proceeds to show – in a very elegant fashion – that even in the domain of human actions, an object can be in a quasi-state of simultaneously both existing and not existing, up until the moment an observer forces the question of whether the object exists or not. At which point the object instantly snaps to one of these two states, as though it had been in that single state all the time.

I won’t spoil the movie for you by saying any more (many have not seen it yet – and I suspect it has not yet been released in various parts of Europe), but I wanted to pay tribute to a moment of cinematic genius: A moral fable that transposes one of the most difficult concepts of quantum theory into human terms, with perfect clarity.

When you see the film, see if you can spot what the “quasi-existing” object is.

Wrong-way Oreo

The other day, for the first time ever, I encountered a wrong-way Oreo. For those of you who don’t know, that’s an Oreo cookie that has one of its two dark chocolate wafers somehow turned around, so that its engraved outer side ends up on the inside, pressing inward to form a tell-tale impression, in perfect mirror-reverse, upon the snowy white cream filling.

I hadn’t been expecting it. In fact, I hadn’t even been aware that such a thing exists. Perhaps there are people who go around and speak of wrong-way Oreos, swapping tales of this arcane mystery in the same hushed and knowing tones they use when speaking of Bigfoot sightings or the alligators that dwell in the sewers of New York. Not that I have ever been in such a conversational group. Until now.

Today I asked various people if they had ever seen a wrong-way Oreo. My friend Charles said he saw one once, a few years back. Several other people reported having seen one as well. Charles has the theory that some part of the manufacturing process involves the chocolate wafer dropping downward, and that every once in great while a wafer lands the wrong way. He may very well be right.

But as I contemplated my oddball Oreo, I couldn’t help thinking there might be some deeper meaning here. Was this perhaps some sort of sign or omen? And if so, why was I chosen to get this cookie on this particular day? Would it still have counted if I had just eaten the cookie without ever looking at it? Or would fate then have conspired to place another wrong-way Oreo in my path?

And if fate were to deliver more wrong-way Oreos to me, what would happen if I were so oblivious that I just kept eating the darned things without ever noticing? Would fate then need to keep feeding me cookie after cookie, hoping against hope that one day I would become less oblivious? Would I one day find myself mysteriously eating entire boxes of Oreos, consuming vast quantities of the things until I became as round as – well – as an Oreo cookie?

These are metaphysical questions, far out of my league I am afraid. My feeble brain can contemplate only one wrong-way Oreo at a time. But even one cookie can have significance. Am I, perhaps, one of the few lucky humans, chosen by alien invaders, set apart by this secret sign from billions of less fortunate earthlings? I can envision a day dawning, after our planet’s ignominious defeat at the hands of the Lepusian space invasion force, perhaps sometime after the dust has settled, when the broken slag heaps of what had once been great earth cities lie smoking in ruins, and the once mighty suburbs of New Jersey have been reduced to desolate wastelands by beams of phase disruptor particles from the Lepusian imperial mothership. The few dazed remnants of a defeated human race slowly emerge, stunned, from out their hiding places, only to be picked off by precision laser fire from the dreaded roving lepudroids. On that day I shall stand triumphant, proud and free, ready to take my rightful place as a citizen of the galactic empire, holding my wrong-way Oreo cookie high for all to see, my ticket to a new world.

On the other hand, there is a chance that might not happen.

Weighing the promise of one day living a life of fabulous adventure roaming the galaxy far and wide in search of new civilizations, against the prospect of eating an Oreo cookie now, my internal struggle was brief.

Reader, I ate it.